Monday, June 29, 2015

Congratulations by Angelica Soh


Happy Monday Crafties!
Congratulations card is here with Cowboy Dan!
Yee haw ...
Here he is ... 

The picture shows better on a computer or landscape view on your phone.


This card is easy peezy, hope you'll enjoy this card as much as I had fun making it.

1) I cut Whisper White Coordinate 12 x 12 cardstock into 8 1/2 x 5 1/2" and scored in the middle 4 1/4 from 8 1/2 2) I cut a red cardstock into 4 x 5 1/4" and double sided taped it and center it onto the white cardstock
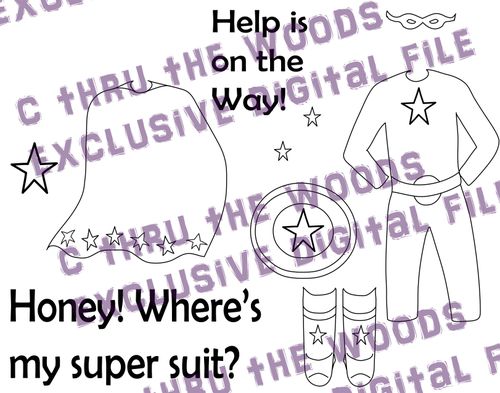
3) So this digital is sized perfectly to fit the card, which I've colored and slight modification on the hair, the shirt from a short sleeve t-shirt to a buttoned up short sleeve collar shirt, added a back pocket and a half side bandanna.
4)Then I cut a dark navy blue cardstock almost 2/3 of the red cardstock, and splatter some watered down acrylic paint on the entire cardstock. It is then adhered to the red cardstock.
5) I took out my Versamark and use a small sponge and randomly dab the versamark randomly on the dark navy blue cardstock and the top 2/3 of the page. Then used my holographic embossing powder on the versamarked areas, then it was later heat embossed to give it some glitter.
6) I used one of Stampin Up's tree stamp and versamark them and stamped the image on and add white embossing powder, was then heat embossed.
7) Then I added the fences, then I used my navy blue ribbon and placed it at the bottom of the red carstock.
8) I cut a small white stripe of paper, place and adhered it between the bottom of the fence, and the top of the ribbon.
9) Then I cut another stripe of navy cardstock and stamped it with the sentiment Congratulations, it was later pop dotted, then placed on the card
10) Later I took some gold stars and place them randomly across the entire top of the card, as well as before and after the sentiment Congratulations.

You may find the beautiful digital and stamps here


Sunday, June 28, 2015

Uncle Sam and Sammy Tags

                                                     Introducing Uncle Sam and Sammy!


These tags were made using Alex and the Simple Stories' Stars & Stripes Collection.
I am a NUT for paper piecing with these stamps!
It is sooooo easy!  If you have never paper pieced then here is a quick "How To".

     Stamp Alex on vanilla cardstock, and then stamp on your papers for clothing selection.
 I used a stripe for the jackets, red for the pants, white for the shirts,and stars for the cumberbunds.  The shoes are colored in for both.  Sammy's hair was colored in, Sam's hair was paper pieced.  The hats were by Jolee. On the vanilla cardstock stamped image, I trim all the areas with clothing a little small by trimming just inside the stamped area.  In the patterned paper, I trim just outside the stamped area.  When placing clothing, apply it just like you would get dressed.  For example, shirt first, then pants, cumberbund and jacket.  This way the pieces can overlap slightly. I always cut all the parts out and then put them together.

 To add a little more dimension, the sleeve on Sam's jacket is cut separately, with the stripes heading in a different direction from the rest of the jacket. 


I prefer most of my dolls without faces, that is a matter of personal preference of course.  If you want faces, stamp multiple heads and practice.  Sam looked pretty silly with a beard and eyebrows but no face...


Using Pop-dots is a fun way to add dimension.  Keep in mind that it adds bulk to your albums, and if you are mailing the tag, you might want to use a padded envelope.
I hope everyone has a safe 4th of July holiday.

Thursday, June 25, 2015

Soccer Father's Day Card by Rosie Posie


Hello, and welcome back!! My husband absolutely LOVED his present and his card!

I knew I needed to use Joe the second I decided to make a soccer player card.  He is the perfect image to make into ANYTHING! Well, I knew I couldn't replicate a Manchester City jersey, so I went to the internet. I eyeballed this and shrunk it down to fit.  I then had to have shorts, so the second image was specifically for the shorts.  I fussy cut all three images out to make sure that they fit and so I could decide which jersey image I liked the best.


Next,  it was time to color Joe.  When coloring the body, I always color outside of the lines. I like the way that they blend better so I am always coloring one for the base and then stamping another image to cut out and glue on.  With Joe, I was going to cover his body so I didn't worry about coloring his torso completely.  I use Spectum Noir markers and after a lot of practice I am able to blend them nicely.  Again, I had to fussy cut him out.  Since I needed his arms available for holding something, I cut out the hands so they were not attached to his torso.  I did not detail cut out the toes because I try to wait for the end so they don't get squished, damaged or messed up on accident. (I usually wait to cut out the fingers and hands as well, but needed to dress Joe differently this time.)


Here I go playing with the body parts again!!  My husband isn't bald and the hair styles with Joe just don't quite match hubby.  But Andrew's head is perfect!  I stamped Andrew's head using my MISTI to make sure I conserve my scraps.  Then I color just his head and cut it out.  Simply glue on Andrew's head to Joe's body and viola! A perfect hubby!


Now for the finished card!  I used a honeycomb embossing folder and embossed the background. I colored in the hexagons that resembled a soccer ball pattern with my black markers.  I liked the shirt tucked into the shorts and it fit perfectly!!  I stamped a soccer ball,  which I cut out and positioned it in Joe's hands.  Now is the time where I fussy cut the feet.  I also used my scissors to make grass for hubby to stand on.  My daughter picked out the stickers to spell DAD in Manchester City colors.  I used some flag dies to cut out some flags and had the kids sign the banners.  Finished up with a "Happy Father's Day" sentiment and I am amazed at the results!  Thanks of looking and of course Joe and Andrew are available in the tic tail store!  http://cthruthewoodsclearstamps.tictail.com/products


Wednesday, June 24, 2015

Super Hero Charlie

Hey everyone! It's Judy here again with a new card
I made using the large Charlie stamp and one of 
the new digital files Charlene created to turn
him into a Super Hero, 
Charlie's Super Suit.


We all have a Super Hero in our lives, right?
I know I do. It's my husband.
He does so much for and cares so for our family
that he never even stops to think before his
"Help is on the Way"!
That's just the way he is.

Anyway, I had a lot of fun creating this card. It started out as a tag
but I felt it needed something else so I added the tag to a
5 1/2 x 8 1/2" card base that was simply created by folding
an 8 1/2 x 11" piece of card stock in half.
I added some DCWV DP and placed the tag on top.
All the stars were cut with an old Sizzix originals die, except
for the smallest ones. Those were punched with a Marvy punch.
Charlie's Super suit was colored with Spectrum Noir markers.

Hope you like him and this inspires you to check out
all the C Thru the Woods products at

Until next week, happy crafting!


Tuesday, June 23, 2015

Stan the Fireman Tags by Holly Ann Bray Designs


Hi! I used the Fireman Stan C Thru The Woods acrylic stamp from artist Charlene Woods' new professional men series for my tag. I loved the versatility of the Stan's accessories. I chose his fireman helmet and ax to complete his look. I knew I wanted to incorporate yellow, orange, and red hues throughout my tag to symbolize fire. I started with a basic paper-lined tag and added paper from the Scrapperdashery paper line called Rudyard Kipling If. ( The paper had a molten and smoky quality which I felt fit the theme.)  I distressed each piece of paper with an Inkssential Ink Blending tool with foam and the following Tim Holtz Distress Inks; Mustard Seed, Fire Brick, Spiced Marmalade, and Walnut Stain. I also distress inked a chipboard frame and added the "Love My Fireman" sentiment which was pop dotted. Stan was stamped on Copic friendly paper and colored with flesh-tone Copic markers. His clothes were stamped on solid red or tan paper and fussy-cut. They were then put on top of Copic friendly paper. The yellow stripes on Stan's uniform were created by using Daffodil Liquid Pearls by Ranger. I then cut extra helmets and radios which were pop dotted to create a 3-D effect. Lastly, I added red ribbon and multi-colored ladder fiber to top off my creation.
The C Thru The Woods Stamps are available in acrylic and digital and can be found at http://cthruthewoodsclearstamps.tictail.com/


Monday, June 22, 2015

Loving our Police officers by Angelica Soh

Happy Monday Crafties!
Guess who? It's Angelica here again to share a lovely card today.
Hope you will enjoy this card as much as I had fun making it.
I will explain how I made this wonderful card below.

The picture shows better on a computer or landscape view on your phone.


1) I started by cutting my gray base cardstock, and scored it to make a 5 1/2" x 4 1/4"
2) I cut my Stampin Up Whisper white card stock to 5 1/4" x 4" 
3) By using Charlene's James Large Stamp set I randomly use each of the accessories stamps, to stamp onto the Whisper white cardstock (not being perfect)
4) After the entire page is filled I pop dotted the back, and adhere it to the gray card base
5) I later cut 2 strips of cardstock using the same gray & whisper white; the whisper white is 1/4" less on each side of the gray strip.
6) I then lined up the "to protect and to serve" stamp, in the middle of the whisper white strip of paper, and stamp that image onto it, then use a ruler and to line up close to the edge of the strip paper, and drew dashed lines along the border 
7) The white strip paper was then pop dotted, and centered onto the gray strip of paper, then pop dotted the gray strip of paper to layer them on top of the already stamped whisper white cardstock. 
8) I took a satin striped ribbon and stick it onto cardstock as shown, then layered a grosgrain ribbon on top of the satin ribbon.
9) I wrapped a black and white baker's twin around and half and inch above from the ribbons and tied a bow
10) I then versamark one of the police hat stamp and embossed it with Stampin Up white embossing powder onto a gray cardstock then was heat embossed and fussy cut, it was later pop dotted, then placed in the middle of the bow to complete the front side of the card.
11) The inside of the card I have cut 1/4" less on the width and 1/2" less on the height from the base measurements, and using the "Love my Police officer" stamp to stamp onto the middle of the newly cut whisper white cardstock.
12)I then wrap the baker's twine twice around that card, and tied a bow, then pop dotted it and layered it to the inside of the card for a finishing touch.

James Large Stamp set could be found here 


Sunday, June 21, 2015

Expectant Mother


The project I would like to share with you today, uses one of our digital files, "Pregnant Couple".  This is a file you can purchase and download from your computer at home at http://cthruthewoodsclearstamps.tictail.com/. Imagine, buying our "stamps" with your nightgown on!  Digital stamps are a great way to paper piece. In case you are new to paper piecing, you just load your printer with assorted colors of cardstock and print the image out multiple times.  Then cut out clothing and body parts and "piece" them together. In this project I just wanted to use the mother's image.  I cut out her blouse and used it as a pattern to make her top, so the father's arms would not be included.  Her hair and shoes were colored in with markers. The pants were pieced in 2 pieces for dimension.  The shirt sleeve is separate and adhered over her arm for dimension.  She was created from 6 different pieces of paper.  The layout uses "Baby Bump"papers by BoBunny.

Friday, June 19, 2015

Add another Hero to your list!!!

This digital file is made to fit the large acrylic stamp, Charlie!!  
Charlie has always wanted to become a superhero and now is his chance!!
Complete with cape, boots, mask, two phrases, shield and super suit!  
Recognize the phrase from "The Incredibles" movie?  
This file is sure to spark your imagination and bring many fun projects to life!

Available at www.cthruthewoodsclearstamps.tictail.com  


Thursday, June 18, 2015

#1 Soccer Fans by Rosie Posie

Good morning!! Today is my day to post to the blog and I am excited to do so! I have been in love with these stamps since I discovered them!! They are very versatile and it is so much fun to mix and match body parts. Yes, that is right….I said body parts!

Both my father and my husband are HUGE soccer fans. My father was my soccer coach for years. My husband and I played soccer for almost 15 years, so you can say it runs in our blood!  The best part of my last pregnancy was I was put on bed rest during the EURO's and a very convenient time to have to lay down!!  Anyway, my husband records the soccer games because we are on pacific time and it is too hard to watch a game at 3am.  For father's day I wanted to give him something from his favorite team.  Fortunately my best friend was in London and picked it up for me. However, I LOVE themes, so I knew I needed to make a matching card!! And since I made something for hubby, it seemed like I just had to do something related to soccer for my dad.

Now since I may have freaked you out talking about body parts, let me post you a photo.  Here is my father's card using Andrew. I loved the suit, because the European coaches always wear suits at the games.  However, my father has a very long beard. So I used the beard stamp from Kris.  Viola!! Problem solved!

For the background I used a honeycomb embossing folder and colored in a few of them black.  I used a toothpick and cut off the sharp ends.  The flag is made from washi tape that was wrapped around the toothpick and I glued a white piece of paper placed on top.  I drew on the glasses since my father wears glasses.  Overall, I am very happy with how he turned out!!

Now since my hubby follows my blogs, you will have to come back next Thursday to see what he received and his card…it is TOP SECRET for now!! But, since I am making you wait, I will also have a mini tutorial on the blog as well!!

Wednesday, June 17, 2015

Dancing Couple


Happy Wednesday!
It's Judy here sharing a card I created using
one of the new digital files Charlene has created.

Dancing Couple


I love digital images because they are so versatile.
I chose a size that would work on my 5 x 6 1/2" card base and
printed on white card stock.
 I colored with Spectrum Noir markers and gel pens, fussy cut
and popped with foam tape on the rectangular panel.
The DP is from the Paper Studio's Simple Elegance paper pack.
I printed the sentiment on the computer and cut with a Sizzix oval die.
The flowers are from Spare Parts by The Paper Studio.

I hope you'll check out all the clear stamps and digital files available at
and 
http://cthruthewoodsclearstamps.tictail.com/

Until next time…
Thanks for stopping by and have a great rest of the week!


Monday, June 15, 2015

Loving Spotty by Angelica Soh


Happy Monday Crafties!
It's Angelica here to share a lovely card
I've created. Hope this will further brighten
your day. I named this card " Loving Spotty "

The picture will shows better on a computer or landscape view on your phone.


I used Charlene's cute new digital file located here

1) I have printed my digital image onto a photo paper. I further drew those puppy eyes, and fill in the spots
 using watercolor marker, and adding extra spots on the dalmatian to further balance the image.
I used a heating tool to dry my marker to heat set it. It was later fussy cut, and had added a bow, that I 
made, to finish off the image. 

2) The word "Love" has been diecut, and I ran my dotted embossing folder at the bottom part of the word 
" Love", (which is part of the diecut) I lined up this piece, and added a strip of the same colored ribbon (that 
I used on the dalmatian), just above from the diecut piece. I've added a strip of metal washi tape across the 
top of that ribbon. and now I could tape down the white " Love diecut piece.

3) I cut a piece of gray cardstock, running the same embossing folder and diecut the scallop edge so final 
size is 5 1/8" x 7/8"; it was pop dotted and layered it onto the card.

4) I took out my score board and scored 3 lines with equal widths and placed 3 candy dots at the top left 
corner on the card base. 

5) Since I love flowers, I decided to add and pretty up my card with Prima marketing flowers and some 
other flowers and leaf I have in my stash; as well as adding a small blingy butterfly to a flower on the top right of the card.

6) Last but not least, I pop dotted the dalmatian, and layered it onto the card for the finishing touch.

Materials used: 
Charlene's digital files could be found here 
Stampin Up' Gray Cardstock and Whisper White Cardstock
Stampin Up' Basic Black Marker
Digital image was printed in photo paper
Navy Blue white line ribbon
Metallic Silver washi tape
Blingy Butterfly
Stampin Up Candy dots
Prima Marketing flower
Other flowers and leaf from my stash
Stampin Up Dot Embossing folder
LOVE diecut is from Die-namics called Celebrate


Friday, June 12, 2015

The Doctor Will See You Now!!!

Meet Bruce! 
This versatile stamp can be used in so many ways!  The accessories include a stethoscope, a surgical mask, a prescription bottle,  a molar, a toothbrush, a mouth mirror, a dental pick, a syringe, dental floss and a blood pressure cuff.
Dress him up as a doctor, a dentist or just a regular guy at work!!
You will have hours of fun with this handsome professional!

Available at www.cthruthewoods.com and http://cthruthewoodsclearstamps.tictail.com/